OpenVPN is still a great way to go in setting up a VPN to access a home network. In addition, if you want that VPN experience to be as close to actually being at home as possible, you may want to use a TAP-style connection. A TAP connection allows you to use resources as though you’re connected locally to the network including printers, file shares and discovery protocols.
This tutorial assumes you have a Raspberry Pi you want use for this purpose and that you’ve enabled SSH access. Many prefer to use the “Lite” versions of the Raspberry Pi OS (formerly Raspbian) for servers, but I like having a GUI available, and use GUI tools whenever possible to facilitate installations. This preference for GUI tools will be apparent in this step-by-step. 🙂
With SSH enabled on your Raspberry Pi (I’m using an RPi4 running the 2021-10-30-raspios-bullseye-armhf distribution), we’ll use WinSCP and PuTTY to do what we need to do. Yes these are Windows tools, so if you’re using another operating system or using terminal directly on the Pi you’ll need to extrapolate to your environment.
Run WinSCP and start a new session using the SCP protocol, the host name for your RPi, and your login name (usually “pi”) and password (“raspberry” if you haven’t changed the default — but you did change the default, right?).
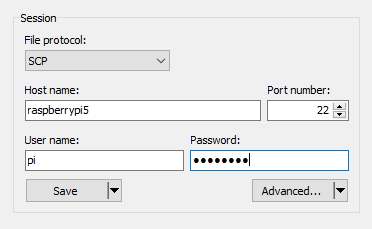
and, very importantly, you need to click on “Advanced…” to change the SCP/Shell setting to “sudo su -” from the dropdown. This elevates your WinSCP session to root.

Click OK on the Advanced Site Settings dialog, then save these credentials and settings (if you like), and click “Login”. Go ahead and cache the host key when that dialog pops up, for quicker connections next time. We’re going to keep WinSCP open throughout this process, but now we’ll open PuTTY from WinSCP using the “Commands” dropdown and selecting “Open in PuTTY”. PuTTY will open using the same credentials you used to open WinSCP. We now have the tools we need to install PiVPN and configure it for a TAP connection.
To install PiVPN we’ll use their script which is executed from the PuTTY windows we opened a few moments ago:
curl -L https://install.pivpn.io | bashCopy the command above, and right-click in the PuTTY window to paste the command, and hit enter to run the script.
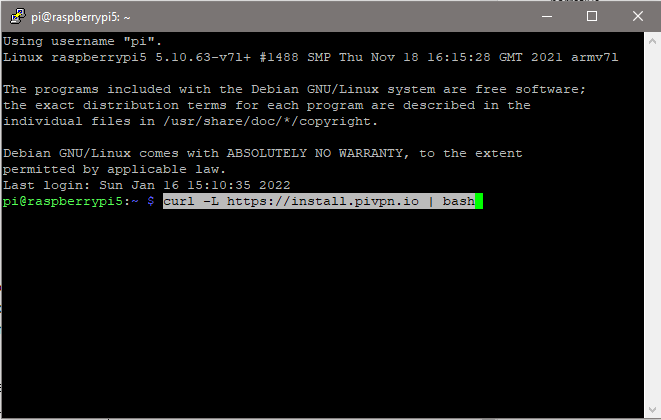
The script will ask a series of questions, to which your answers will vary depending on your environment.
In my case, I’ll be indicating I want to install OpenVPN (Wireguard doesn’t support TAP interfaces), and that I’ll be using a DHCP reservation for my server rather than a static address.
I have a static public IP address so I’ll choose that for my VPN clients to use, but if you have a dynamic IP address (like most people) you’ll need to use a Dynamic DNS provider to keep track of your IP. Setting up a DDNS service is outside the scope of this tutorial, so you’ll need to do some research if you haven’t done this before.
Once you get to the end of the script, you can go ahead and reboot your server. WinSCP will reconnect automatically, and you can re-open Putty using the “Command” dropdown now, or next time we need it.
At this point you should have a running OpenVPN server in TUN mode. We’ll be making a number of changes to make this server operate in TAP mode.
The next step is to create a script to setup the bridge that’s going to be used by the TAP interface. Using WinSCP, navigate to /etc/openvpn, which should look like this:

Right-click on an open area of the /etc/openvpn pane, and select “New” and then “File”:

The file you’re creating will be named “openvpn-bridge”, and needs to contain the following code:
#!/bin/sh

# Define Bridge Interface
br="br0"

# Define list of TAP interfaces to be bridged,
# for example tap="tap0 tap1 tap2".
tap="tap0"

# Define physical ethernet interface to be bridged
# with TAP interface(s) above.
eth="eth0"
eth_ip="192.168.110.129"
eth_netmask="255.255.255.0"
eth_broadcast="192.168.110.255"
eth_gateway="192.168.110.1"

case "$1" in
start)
for t in $tap; do
openvpn --mktun --dev $t
done

brctl addbr $br
brctl addif $br $eth

for t in $tap; do
brctl addif $br $t
done

for t in $tap; do
ifconfig $t 0.0.0.0 promisc up
done

sleep 10

ifconfig $eth 0.0.0.0 promisc up

sleep 5

ifconfig $br $eth_ip netmask $eth_netmask broadcast $eth_broadcast

sleep 2

route add default gw $eth_gateway
;;
stop)
ifconfig $br down
brctl delbr $br

for t in $tap; do
openvpn --rmtun --dev $t
done

ifconfig $eth $eth_ip netmask $eth_netmask broadcast $eth_broadcast

route add default gw $eth_gateway
;;
*)
echo "Usage: openvpn-bridge {start|stop}"
exit 1
;;
esac
exit 0
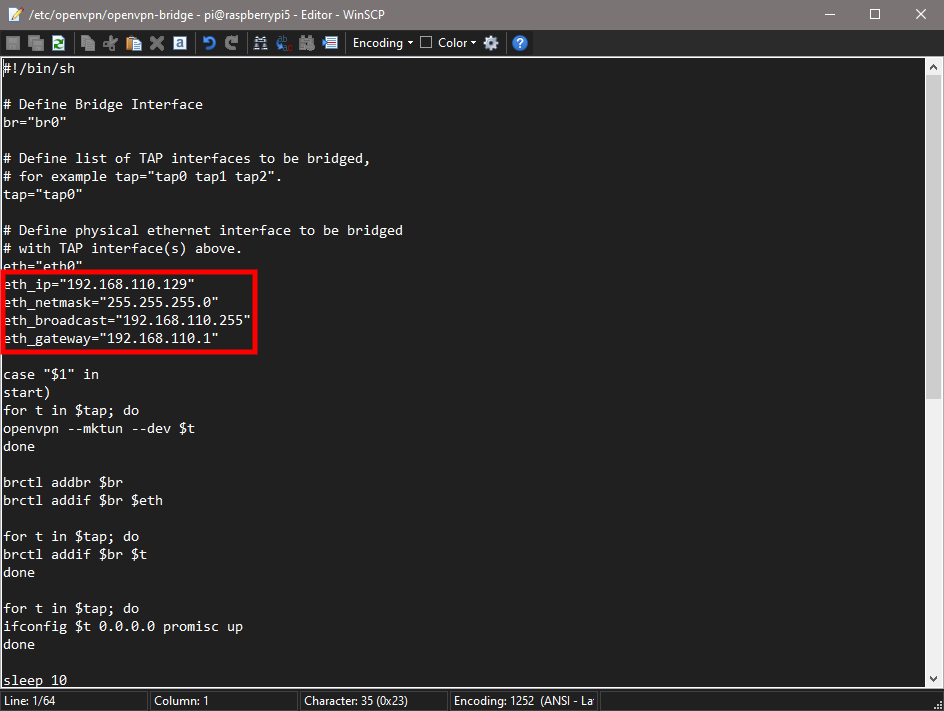
Which will look like this in WinSCP. Please note that the items in the red box are the IP addresses for my network, and you should edit these for yours. eth_ip is the reserved address of your OpenVPN server, eth_netmask will be the same for most networks, eth_broadcast will typically just be modified with your subnet (mine is 110), and eth_gateway is the IP address of your primary router:
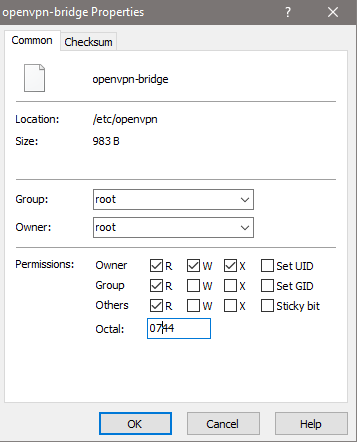
Next, it’s time to make the file executable, by changing the permissions to 0744. In WinSCP this means right-clicking on the openvpn-bridge file and selecting “Properties”. Change the “Octal” to 0744 and click “OK”.
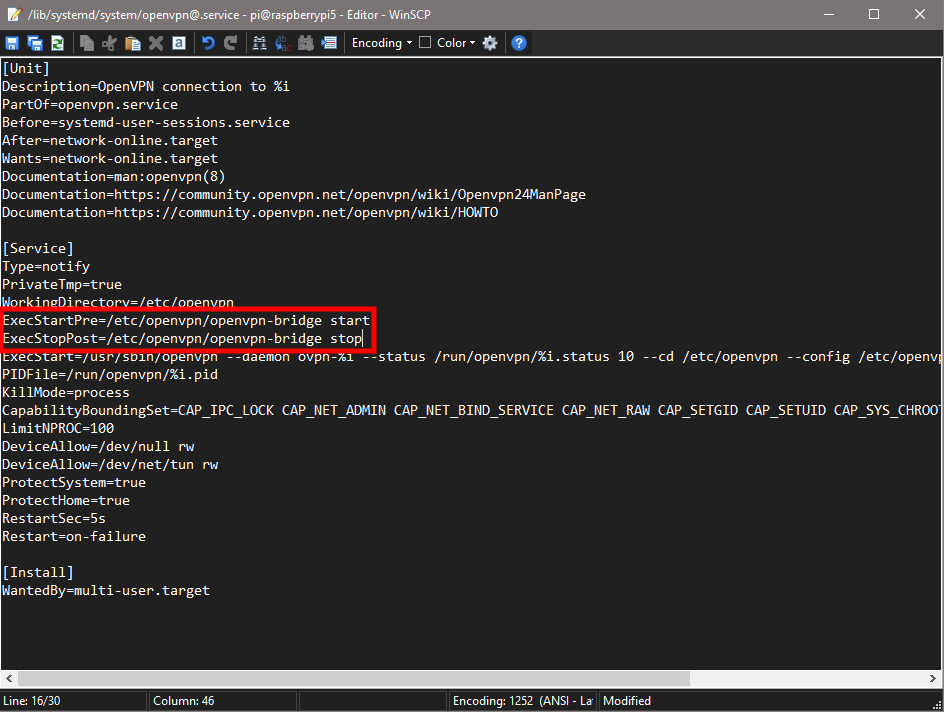
Next, navigate to /lib/systemd/system/openvpn@.service, open it, and add the following two lines after the WorkingDirectory=/etc/openvpn line:
ExecStartPre=/etc/openvpn/openvpn-bridge start
ExecStopPost=/etc/openvpn/openvpn-bridge stop
And it will look like this when you’re done:
Now we need to install the bridge-utils package using PuTTY. From the “Commands” dropdown, select “Open in PuTTY”, copy and paste the following and hit enter:
sudo apt install bridge-utils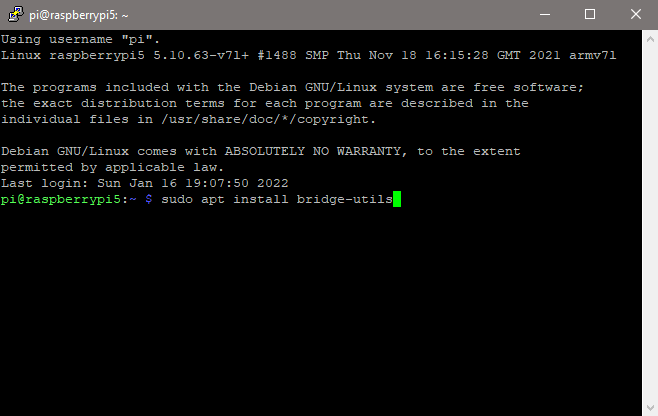
Next, using WinSCP once again, we’re going to navigate to /etc/openvpn/server.conf and modify the following lines. Note that the IP addresses after “server-bridge” and “dhcp-option DNS” need to be correct for your network.
For “server-bridge”, the first is the IP address of the OpenVPN server, second is the netmask, third is the beginning of the the IP range to be assigned to OpenVPN clients, and fourth is the end of that range (mine is small with just 3 IP addresses available).
For “dhcp-option DNS”, I have two Pi-ihole DNS servers so I’m listing both, on most networks the IP address of your primary router is the correct address to use.
Lines in green have been commented out (with #) or added:
# dev tun
dev tap0
proto udp
port xxxxx
ca /etc/openvpn/easy-rsa/pki/ca.crt
cert /etc/openvpn/easy-rsa/pki/issued/raspberrypi5_xxxxxxxx-xxxx-xxxx-xxxx-xxxxxxxxxxxx.crt
key /etc/openvpn/easy-rsa/pki/private/raspberrypi5_xxxxxxxx-xxxx-xxxx-xxxx-xxxxxxxxxxxx.key
dh none
ecdh-curve prime256v1
topology subnet
# server 10.8.0.0 255.255.255.0
server-bridge 192.168.110.129 255.255.255.0 192.168.110.2 192.168.110.4
# Set your primary domain name server address for clients
push "dhcp-option DNS 192.168.110.46"
push "dhcp-option DNS 192.168.110.48"
# Prevent DNS leaks on Windows
# push "block-outside-dns"
# Override the Client default gateway by using 0.0.0.0/1 and
# 128.0.0.0/1 rather than 0.0.0.0/0. This has the benefit of
# overriding but not wiping out the original default gateway.
# push "redirect-gateway def1"
push "route 0.0.0.0 255.255.255.255 net_gateway"
client-to-client
# client-config-dir /etc/openvpn/ccd
keepalive 15 120
remote-cert-tls client
tls-version-min 1.2
tls-crypt /etc/openvpn/easy-rsa/pki/ta.key
cipher AES-256-CBC
auth SHA256
user openvpn
group openvpn
persist-key
persist-tun
crl-verify /etc/openvpn/crl.pem
status /var/log/openvpn-status.log 20
status-version 3
syslog
verb 3
# DuplicateCNs allow access control on a less-granular, per user basis.
# Remove # if you will manage access by user instead of device.
# duplicate-cn
# Generated for use by PiVPN.io
Now, it’s time to generate the .ovpn file for your client. Using your PuTTY window, copy and paste the following and hit enter:
pivpn -a nopass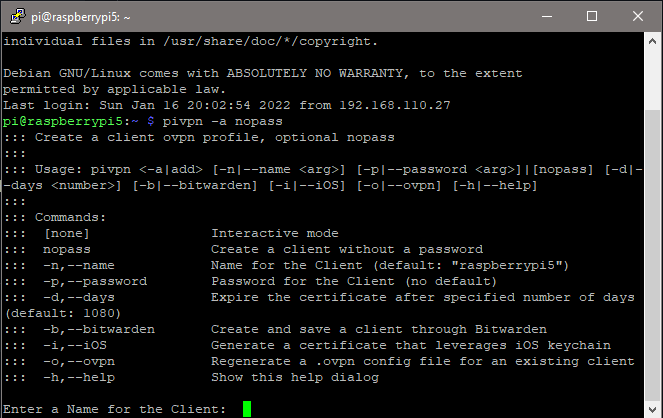
Name your client file using either a person’s name, name of the client device, or location where the OpenVPN server will be located — whatever makes sense to you. You can accept the default number of days for the certificate to be valid.
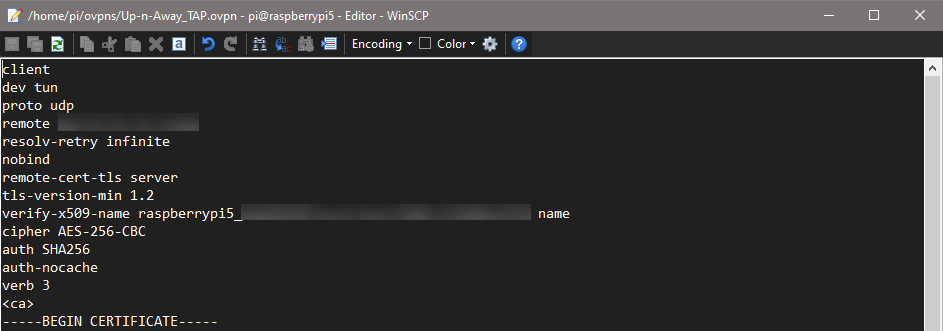
The newly generated .ovpn file will be located in /home/pi/ovpns. Navigate there using WinSCP, and double-click to open it in the editor. Change “dev tun” to “dev tap”, and click “Save”.:
Right-click on the .ovpn and select “Download” to get the settings file onto the Windows laptop we’ve been using, and that we’ll be using shortly for testing.
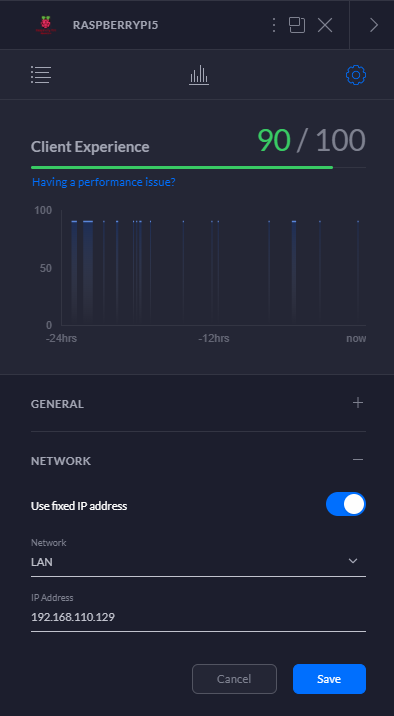
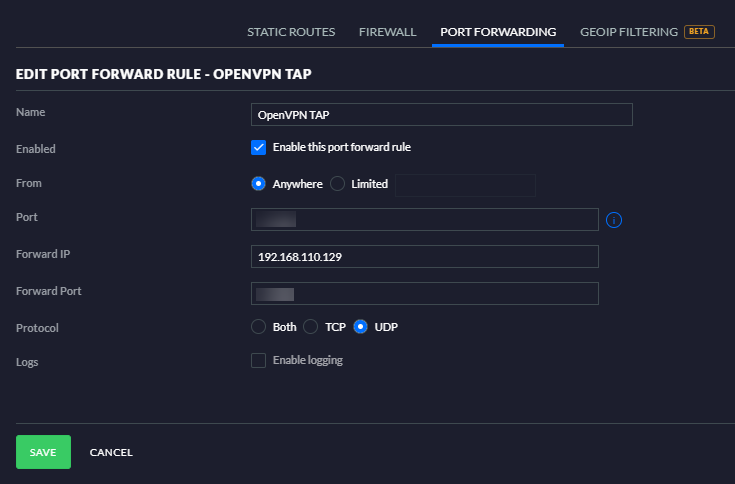
The final housekeeping items are to actually set a DHCP reservation for our Raspberry Pi, and to open a port in the router to direct incoming OpenVPN traffic to the correct IP address on our LAN. How this is done varies from router to router, but here’s what it looks like on my UniFi Security Gateway, via the UniFi Controller software:
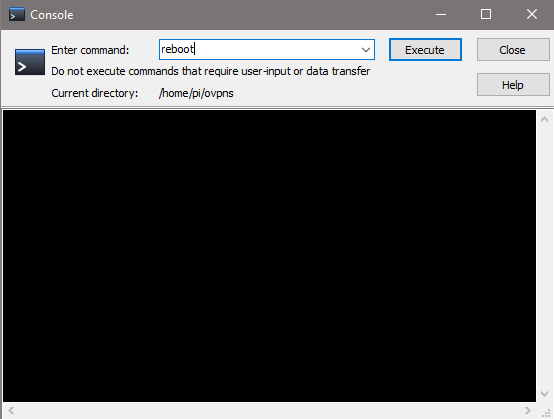
Let’s reboot the Raspberry Pi at this point, and then we’ll test things out.
In order to do a proper test, you need a second way to access the Internet. Some sort of cellular hotspot is a good choice, and I’ll be using something just like that. Worst case, you can take your laptop to a coffee shop, library, or other public WiFi location and try to connect up from there.
On my Windows laptop, I’ll import the .ovpn settings file using the OpenVPN GUI application for Windows. Once imported, I’ll select it, and click connect:

And, if you get a notification like the above, that’s a good sign! Check File Explorer and make sure your network devices are discovered — which could take a while, so wait for the progress bar to get to the end. You can also test by RDPing into any PCs that are setup to allow it. Like most TAP configurations, the idea with this setup is to continue to use your local Internet connection for speed, but have access to all of the resources on the network you’re attached to including discovery protocols and hostnames.
Until next time!

Thank you very much for this Tutorial.
I tried it for 2 days to get it working.
very good Work!
I’m glad you found it useful! BTW, if you’d like to have a GUI to monitor your PiVPN server, along with generating user .ovpn files and more — I’ve developed one:
https://github.com/bnhf/pivpn-tap-web-ui
Requires Docker, with Portainer, Cockpit and Organizr recommended. I have this combination running on everything from a Raspberry Pi 3B to a NUC i7 10th gen with Debian 11.
I used OVPN with TAP mode before. But I installed it differently. I needed tap mode to play old games like heroes V with my friend. These games require broadcast support to search for LAN sessions. On the old configuration it worked but for some time there were disconnections. We recently tried a VPN setup from this solution and that’s it. Zero disconnections + pings around 15ms. Thanks a lot.
Thank you very much for your explanation.
Now I have a probem, because I have a Wireguard Server on the same Raspi and if i have openvpn up (br0 as default gw) Wireguard Server have not internet…
Any idea? Thanks again!
I haven’t tried having a Wireguard server and an OpenVPN server on the same Raspberry Pi. I’ve attempted to get OpenVPN TAP and TUN servers running on the same machine without success, so I’m not too surprised it doesn’t work with Wireguard either. If it’s important to you to have both servers on the same device, I’d suggest adding another Ethernet adapter (via USB3 if possible). Use the built-in Ethernet for Wireguard (and other traffic) and the new adapter just for OpenVPN TAP. Otherwise, if you have another system running Docker you could move the Wireguard server over to that, and keep the OpenVPN TAP server on the RPi. Let me know how you make out.
Thank you very much for your answer. Sorry for the delay, I totally forgot to reply you.
well written guide. However, when following the steps exactly on an RPI5 using latest install of bookworm 6.1 (December 5th), all connectivity is lost when rebooting at the very final stage prior to the test. Can’t ssh, etc, into the machine any more. End up having to do a clean rebuild from scratch.
Has something changed in Bookworm?
I haven’t tried this process yet with either an RPi5 or Debian Bookworm. It’ll be some weeks before I can give this a shot myself, in the meantime though my number one suspect would be DHCP. What I mean by that, is you should try setting up your RPi with a static IP — and in this case, a DHCP reservation is not equivalent. You should double check what the process is to do that, but on Debian Bookworm I believe it would be done via /etc/dhcpd.conf. Please confirm that though, as you may find there are several approaches to setting a static IP on the RPi, and you can choose the way you like best.
Thanks!
I’ll investigate and report back. It seems that DHCPD has been deprecated (well, still in the dist but no longer used) so that might be the thing.
Right…. progress on Bookworm.
I took a clean install of the latest release and firstly installed the NOIP DUC. I then installed PiHole and pointed my router at it. Finally I installed smb and mapped my home share from my MAC. I then installed PiVPN twice. Firstly, a Wireguard instance. Secondly, an OpenVPN instance.
I then tested that everything was working [it was….].
In order to test the theory that the problem was loss of ip address, i created a file here:
/etc/network/interfaces.d/eth0
with the following contents:
allow-hotplug eth0
iface eth0 inet static
address 192.168.68.129
network 192.168.68.0
netmask 255.255.255.0
gateway 192.168.68.1
[for others: i did this to assign a static IP address to the pi. The primary device name on my pi is eth0, which you can find for yourself by typing ifconfig on your pi. Prior to following The Slayers instructions, that was the only one with an IP Address next to it.]
I then picked up your instructions at the point of creation of the bridge file.
Suffice to say: you were right. I could access my pi using VNC and ssh. My pi can see the internet, my network can see my pi. My network can see the internet. PiHole works. So far so good.
I then connected a MacBook to my iPhone, turned off all other networks, copied across the oven file, and launched Tunnelblick.
More good news: the MacBook gets a new IPaddress [192.168.68.50 in my case, being the first i the range i specified in the server.conf file. The macBook can see the internet.
But…. bizarre this….. the MacBook cannot see anything else on the network. It cannot ping anything on the network, not even the RPI [although clearly it is communicating with it otherwise it wouldn’t be able to connect to the VPN and wouldn’t be able to see the internet].
It feels like ive missed something VERY simple somewhere…..
But otherwise it feels like this still works!
One note: having done all of this, back on the RPI, typing ifconfig results in a change. The eth0 adapter no longer has an IPV4 address, only BR0 has an IPV4 address (the correct, fixed one i set above). All of my other adapters including ETH0 now have IPV6 addresses only. What is odd is that i have IPV6 turned off on my network, so no idea where they came from!
I am wondering if this in fact is the problem…..
ideas?
Forget that problem. I was dumb.
I forgot the “0” in the first line of my server.conf “dev tap0”
Long story short, it all works. Perfectly. Just need to add the static IP address per my instructions above and you’re good to go.
I set this up on a Raspberry Pi 5 (standard 64-bit OS). It seems to be working okay (client gets an IP on the LAN and can access shared folders, printer, etc) but the MAC address for the bridge changes every time the PI reboots. The router sees the Pi as that new dynamic br0 MAC address rather than the fixed eth0 MAC address it was seeing before – so I can’t reserve an IP in the router DHCP. I feel like something is probably not right?