If you’re a regular user of RDP to administer Windows based systems, you’re probably wondering how to enable it on your Linux Mint system so you can use the same set of tools for both Operating Systems.
Getting RDP going is relatively easy, but I’m also going to cover the trickier part of dealing with a number of applications that don’t work properly without Elevated Privileges — and getting those privileges is typically blocked when accessing a system via RDP. Fortunately, there are work-arounds without resorting to constantly using the command line.
Keep in mind what we’re doing here will make your system somewhat less secure, which typically isn’t a problem on a home network, but wouldn’t be recommended for corporate or school networks.
So we’ll get things rolling by installing xrdp using the Synaptic Package Manager. From the Mint launcher, select “Administration – Synaptic Package Manager”, followed by your password. Click on “Search” in the upper-right corner, and type in “xrdp”:
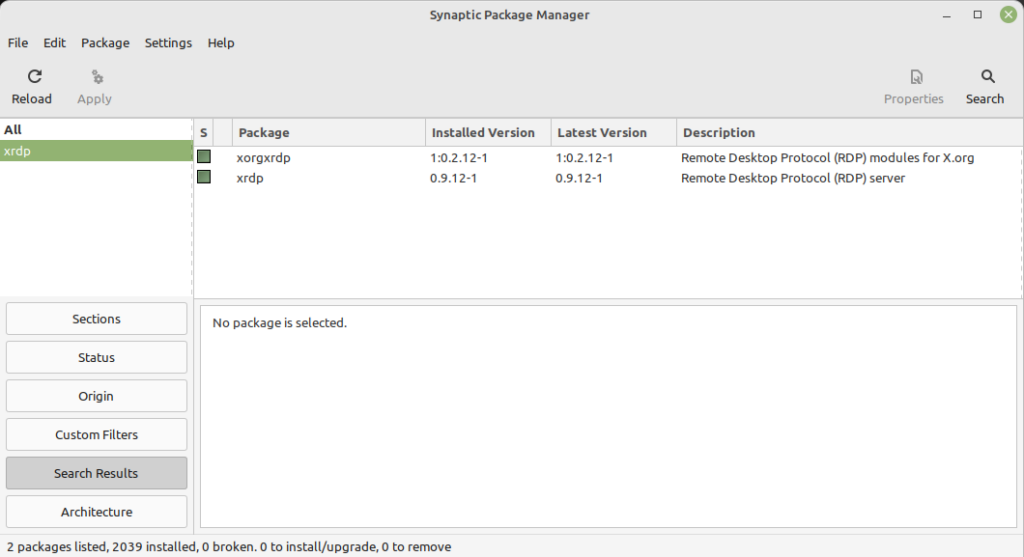
Right-click on “xrdp” and select “Mark for Installation”. Click “Apply”, and both the xrdp and xorgxrdp packages should show as installed. This is indicated by the tick-boxes being solid as in the above screen capture.
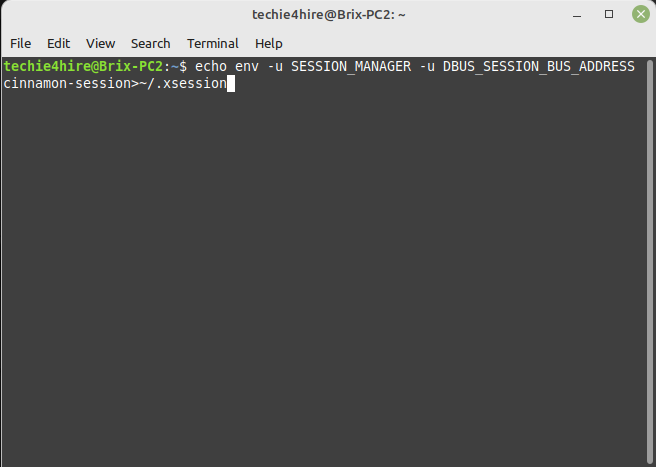
Next from a terminal window type in the following:
echo env -u SESSION_MANAGER -u DBUS_SESSION_BUS_ADDRESS cinnamon-session>~/.xsessionWhich should look like this:
You should now be able to login using the RDP application built into Windows, or by using Microsoft’s excellent RDP apps for Android and iOS. I typically use hostnames rather than IP addresses, and save my login name and password in the RDP applications for ease-of-use.
Unfortunately, if you left things like this you’d quickly be frustrated by applications that won’t open and password entry that seems to accomplish nothing. Many functions that require “Elevated Privileges” just don’t work over RDP (by design apparently).
So, next, we’re going to upgrade our situation by creating a special file that will allow us to run the file manager with privileges. Go ahead and login over RDP at this point, as we should be able to do what we need to do from there. Double-click on the “Home” folder in the upper-right corner of your desktop, and you should see this window:
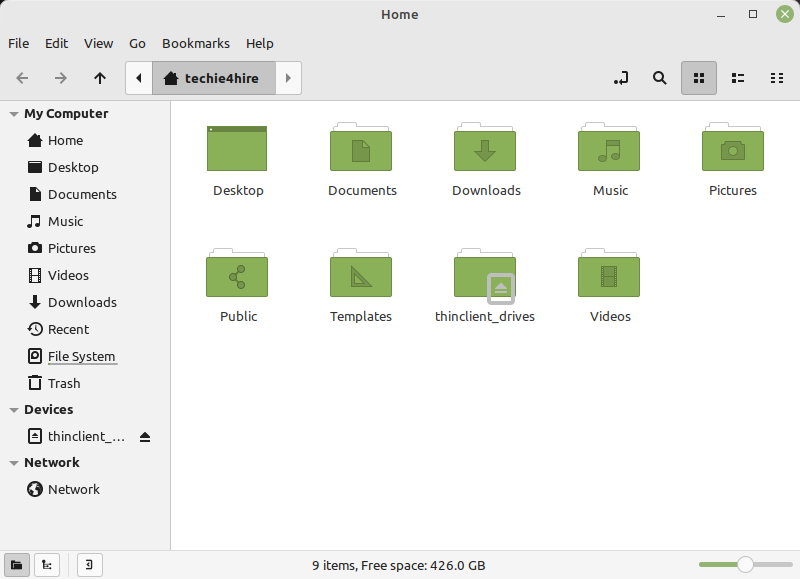
From the “View” dropdown tick the “Show Hidden Files” box. Right-click anywhere in open space on this window, and you should see a pop-open menu like this:
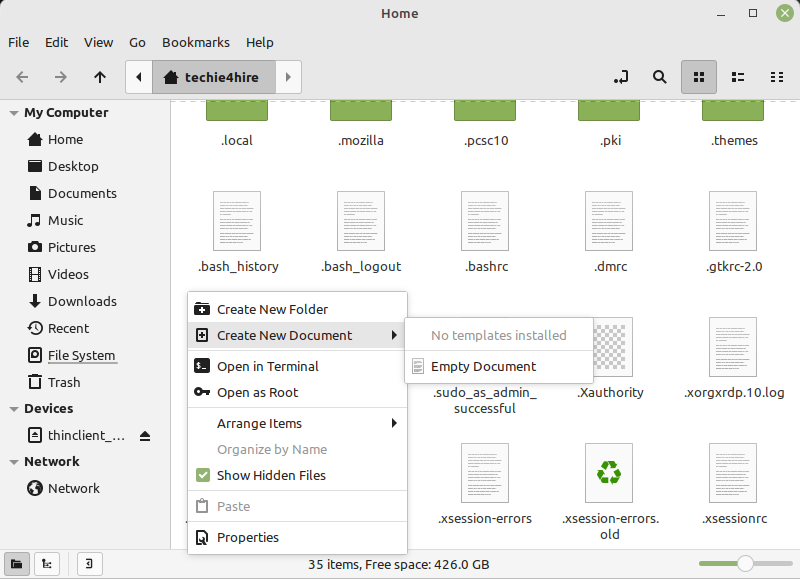
Click “Create New Document – Empty Document”, which we’ll name “.xsessionrc”. As you can see this file already exists on my system, but shouldn’t yet on yours. Double-click on your newly created empty “.xsessionrc” document, and paste in the following:
if [ $DISPLAY != ":0" ]
then
  export XAUTHORITY=${HOME}/.Xauthority
fi
Save the file and close the “Files” application. You’ll want to reboot at this point, so when you reconnect this change will take effect. The usual GUI Restart and Shutdown can also be troublesome via RDP, so I’d recommend you get in the habit of using the following for “Restart”:
sudo shutdown -r nowAnd, for “Shutdown”:
sudo shutdown -h nowBoth need to be done using the “Terminal”. After the reboot, to test that we’ve implemented this change correctly, open “Terminal” and type in:
sudo nemoAfter typing in our password, we should see a “Files” windows with the red “Elevated Privileges” banner:
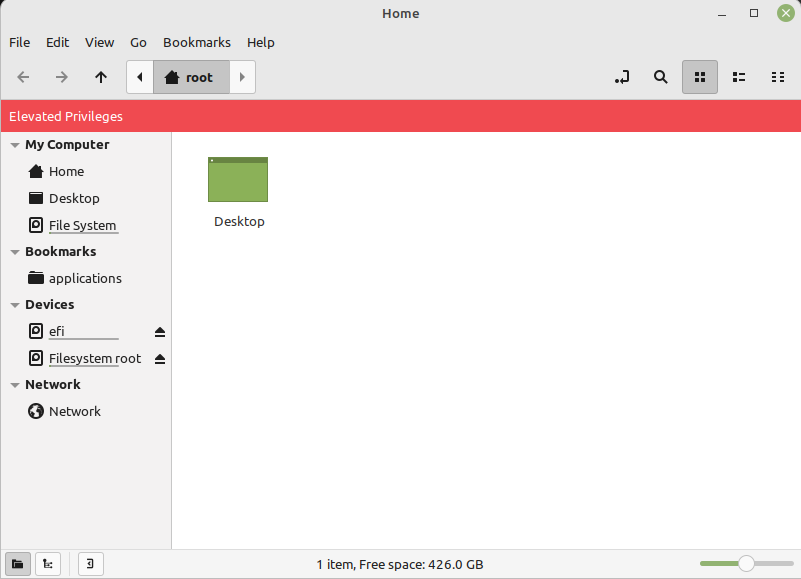
Obviously, this will be handy for being able to modify system files or the like, as the “Open as Root” option doesn’t work over RDP. We’re going to take this a step further though, and create a new “Files” icon on the desktop, that has this upgraded functionality baked-in.
To do this, right-click anywhere in empty space on the desktop, and you should see this pop-open window:
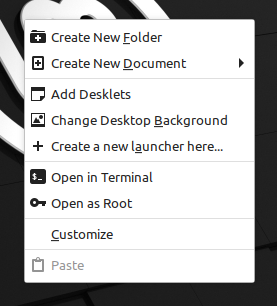
Select “Create a new launcher here…”:
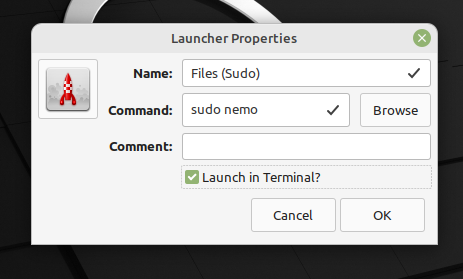
And complete as shown above. Also, let’s change the icon to match out other launchers for “Files”. Click on the current red rocket, followed by “Applications” and then search for “file-manager”. We’re just using the icon so we’ll select the first on the list. Click the “Select” button for the icon followed by “OK” to create the launcher. No need to add it to the menu, as we’ll just use it from the desktop. Click on the newly created icon, enter your password, and we’ll be using an elevated version of “Files”.
We’ll take this a bit further though, and create a “Files” bookmark for the Applications folder, so that we can launch an application like Timeshift with needed privileges over RDP.
Double-click on your new “Files (Sudo)” icon, and click on “Filesystem”, scroll down to “usr” and double-click that, followed by “share”, and finally “applications”. Once you’re in /usr/share/applications, go to the “Bookmarks” dropdown and select “Add Bookmark”. Once that’s done your new bookmark should appear:
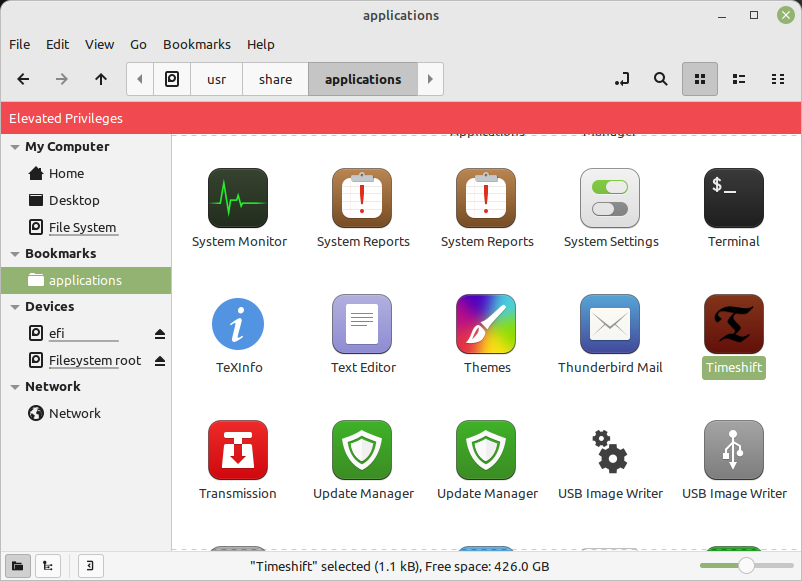
This will allow you to get quickly to any application that doesn’t run properly (due to issues with privilege), over RDP.
And that’s about it! You should now be able to fully administer your Linux Mint 20 system over RDP. If you’re interested in being able to login via SSH or use WinSCP as root, check out my related post about how to get those going:
Until next time!
