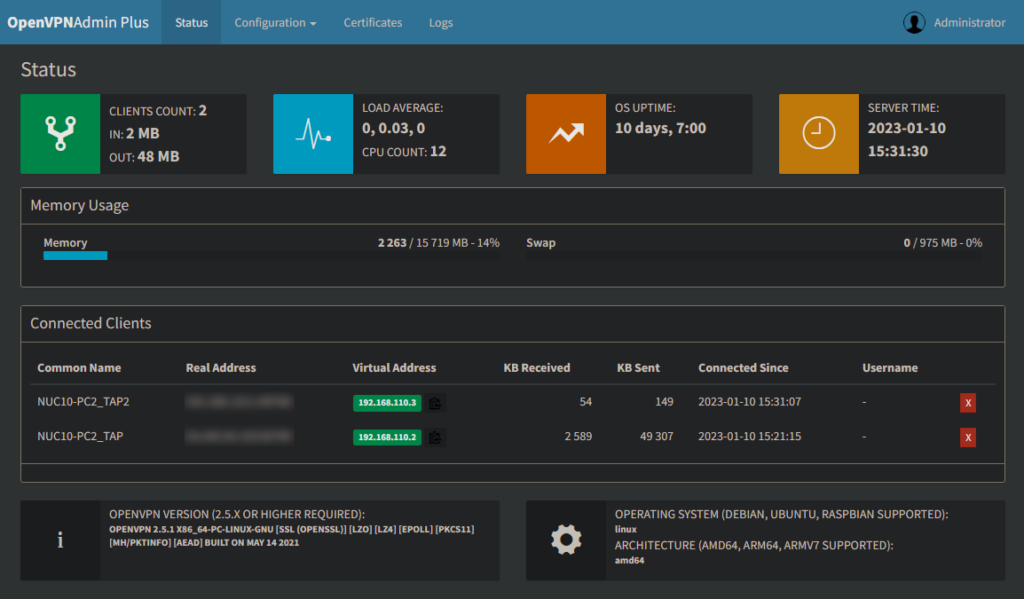
If you’re running an OpenVPN Server, here’s an excellent tool for keeping track of who’s connected, for how long, and how much data they’re using. In addition, it’ll show you what client keys/certificates have been created, and will allow you to download .zip or .ovpn files for those clients. Revoking and removing of client credentials is also supported.
OpenVPN Admin Plus is Docker based, so it’s easy to deploy and a cinch to maintain, especially when using tools like Portainer and Watchtower.
Here’s an example of the Status page:

OpenVPN Admin Plus is designed using PiVPN as the OpenVPN installation script, though it should work just fine with other host-based scripts or manual installations. Using OpenVPN on the host allows you to support TAP connections (on compatible clients) as well as TUN. TAP based connections give you an IP from the LAN you’re connected to rather than a separate subnet with TUN connections. With TAP, network browsing and hostname resolution work just like when you’re connected locally.
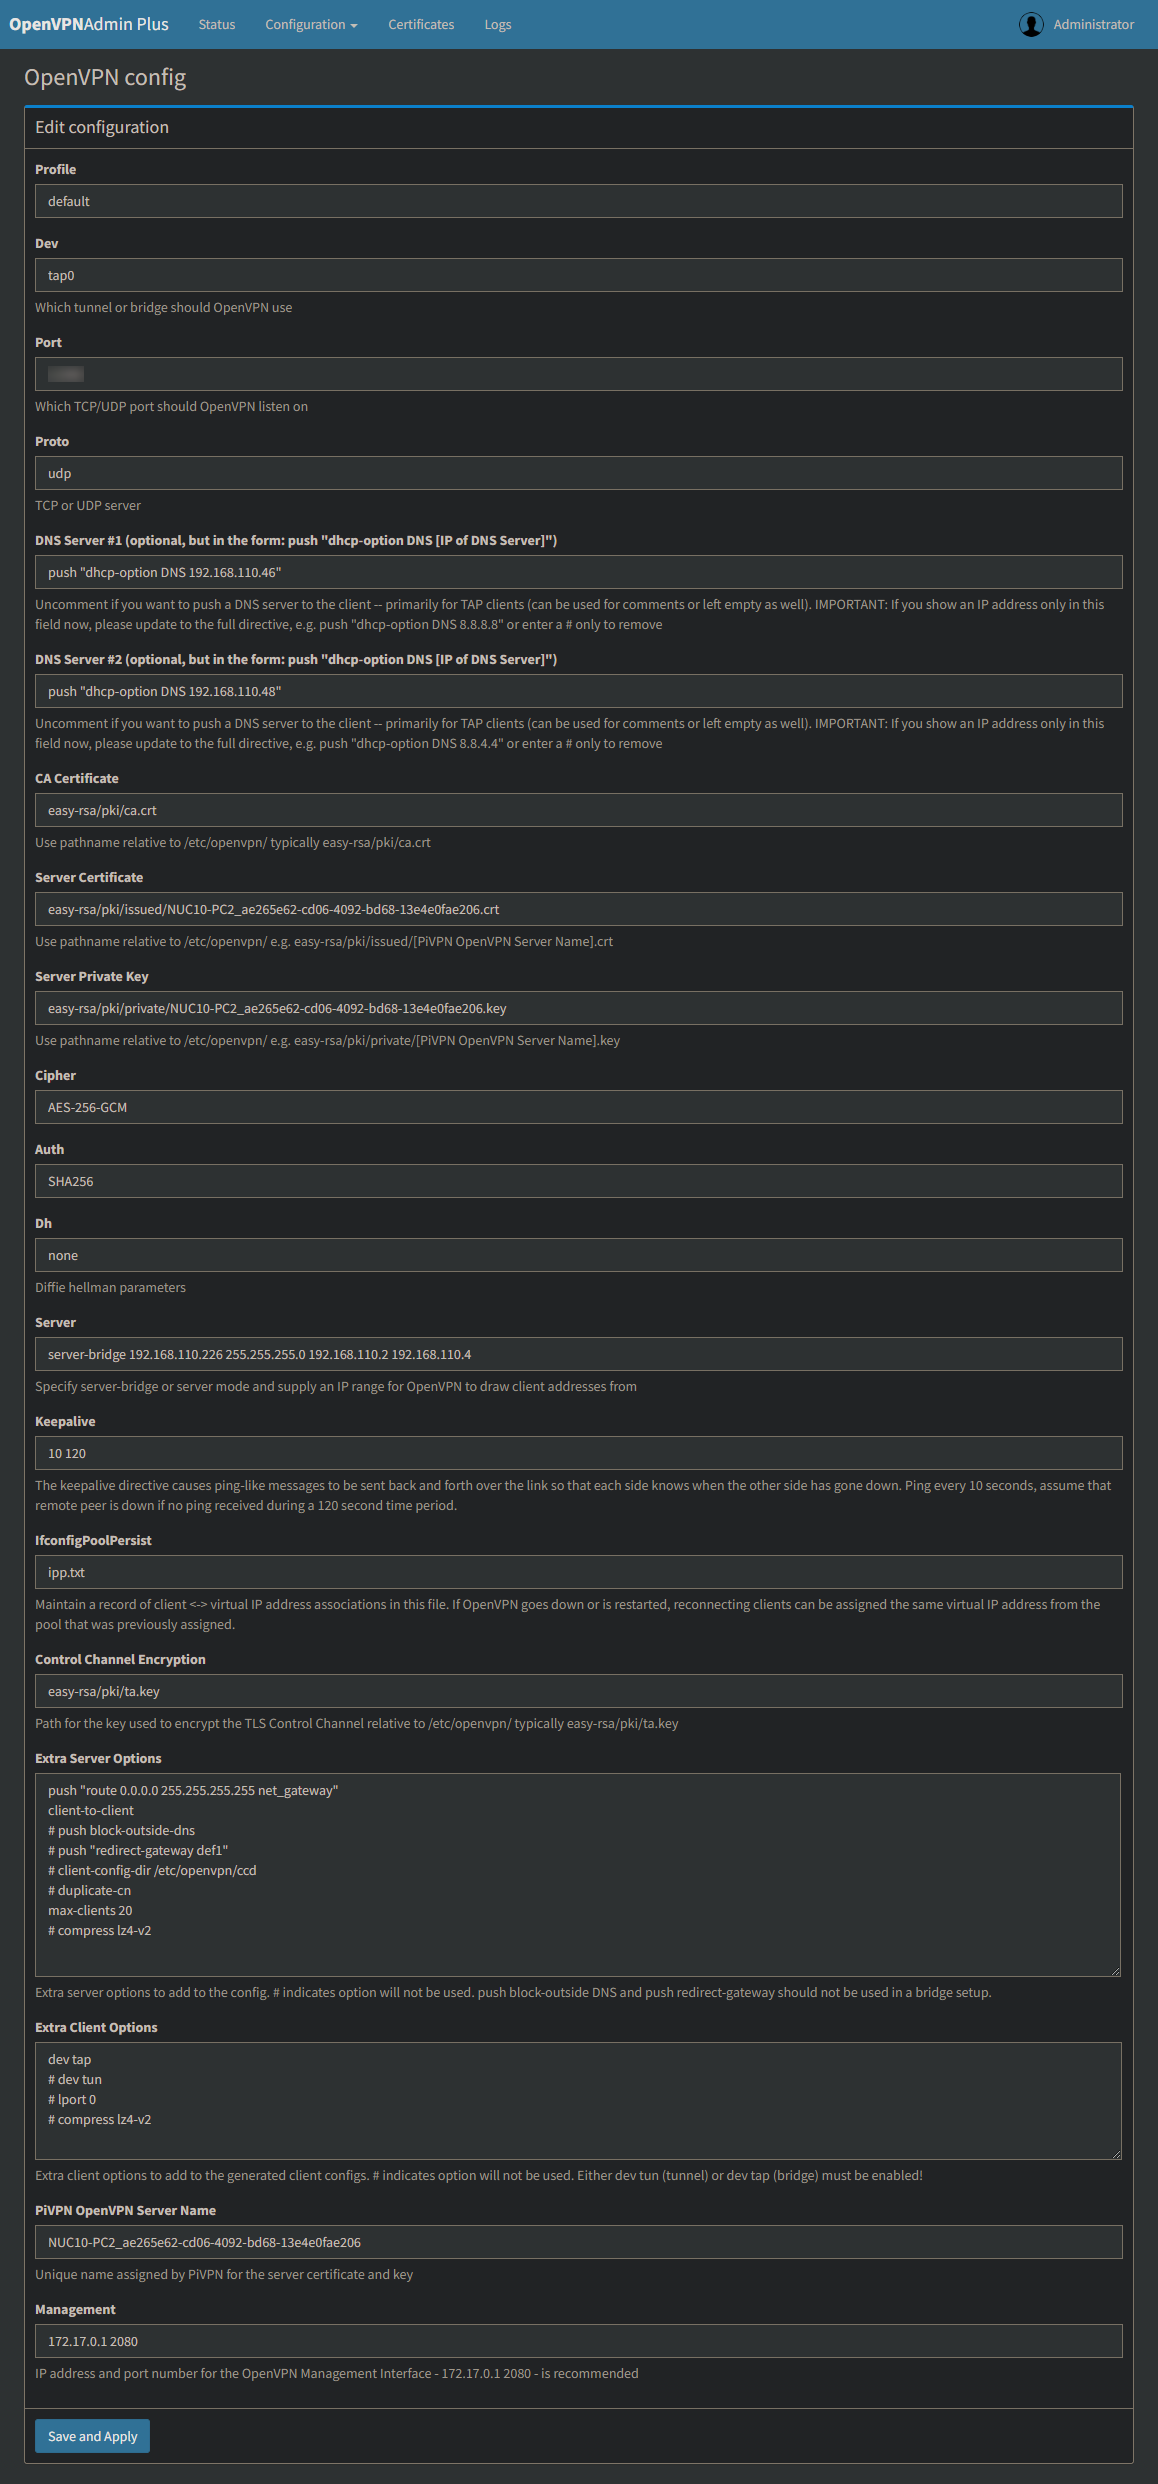
The first tasks when setting up OpenVPN Admin Plus, is to run through the OpenVPN Settings once, as this will add a few necessary OpenVPN directives to get everything working just right. Having a printout, or text editor open with your current active server.conf (found in /etc/openvpn) file is handy at this point. Modify the defaults in the web user interface, to match what’s in your active server.conf file and click Save & Apply. You’ll need to restart the OpenVPN service or reboot your computer for those changes to take effect. Once you’ve run through this once, the settings shown in the UI will match your active directives.
Here’s an example of the OpenVPN settings file:

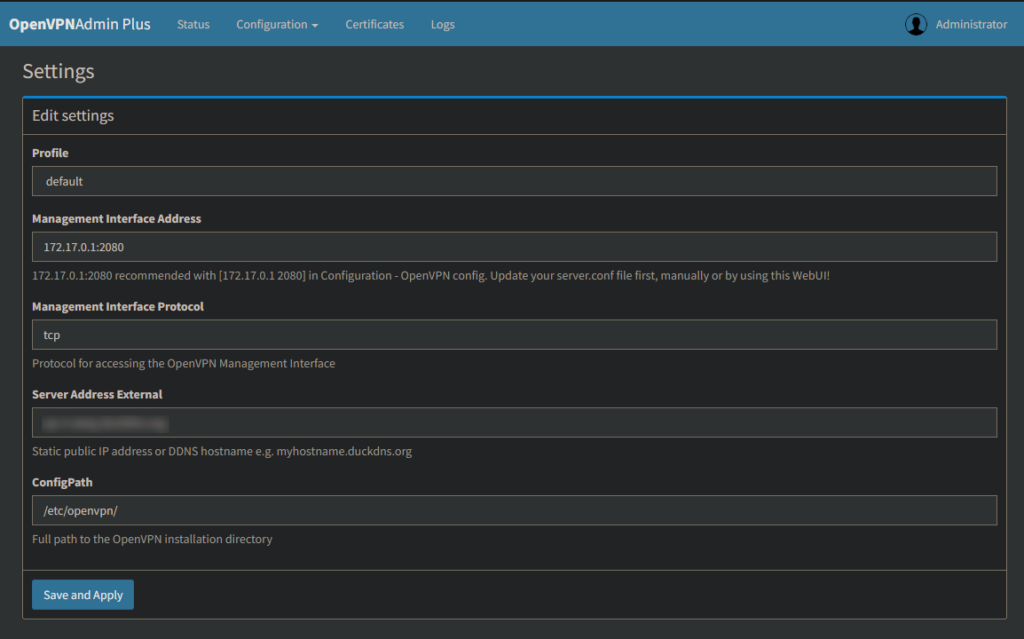
After your OpenVPN settings have been updated it’s time to update the settings for OpenVPN Admin Plus. These are found under Configuration – Settings. The two that you’ll likely need to change are the Management Interface Address, and Server Address External.
Assuming you went with “172.17.0.1 2080” for the IP and port for the Management Interface to listen on in your OpenVPN Settings, then you’ll want to use 172.17.0.1:2080 here. This tells the UI to use the default Docker gateway address and default port to communicate with OpenVPN on the host. Your Server Address External (public IP of your router’s WAN interface) can either be a static IP (if you have one) assigned by your ISP, or a DDNS address if you’re using a service like duckdns.org to keep track of a dynamic IP for you.
Here’s an example of the Settings page:

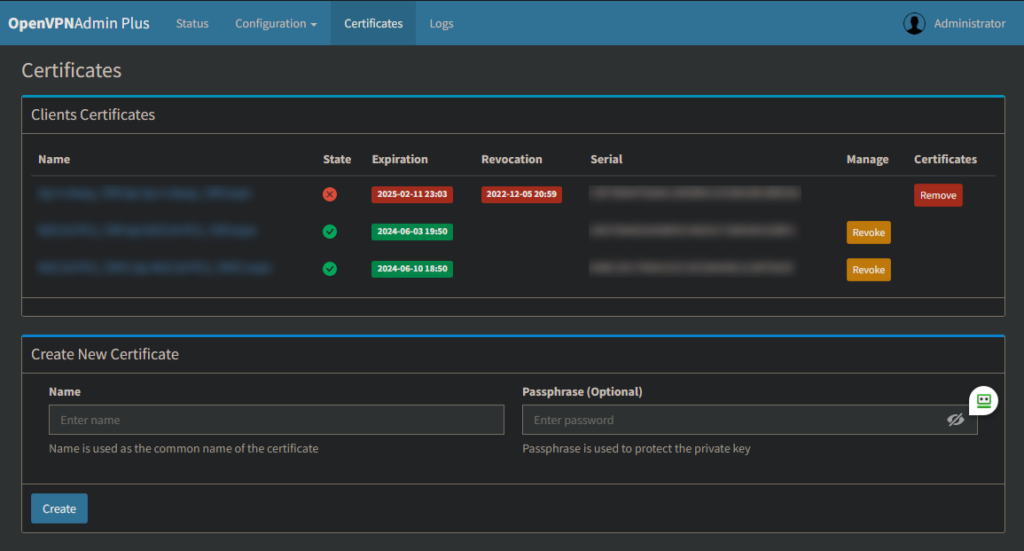
With your OpenVPN server ready to go, you’ll want to create a client or two. This is done using the certificates drop-down. Use client names that are meaningful to you — which could be the person’s name that will be connecting, or a location, or the name of the server or whatever. Don’t use spaces or special characters other than “-” or “_”. Using a passphrase is optional, but gives extra security in case the .ovpn or .zip files fall into the wrong hands. There is no way to recover the password, so be sure to keep track of it! Certificates created here, or via the command line should all appear here, and can be revoked or removed when needed.
Here’s an example of the Certificates page:

And finally, the last 200 lines of the openvpn.log file can be viewed in the UI. Lots of good information in the logs, and one should keep an eye out for WARNING or ERROR messages in particular, in case any action is required.
In addition to what’s been discussed here, there’s information you’ll need to get setup on the project’s GitHub page:

Hi mate, thanks for your efforts.
Is there any tutorial how to install this web UI on ubuntu?
I tried the link below to install it, but there is no UI to access from web.
https://technologydragonslayer.com/2022/01/16/installing-an-openvpn-tap-server-on-a-raspberry-pi-using-pivpn/
This project can be installed on Ubuntu, but requires Docker. If you haven’t used Docker before it’s pretty easy to install with the Docker “convenience” script. Portainer is also a recommended tool as it gives you a Web UI to manage your Docker installation. The original version of this project had an outdated version of OpenVPN in a second container, but as part of the extensive updating and expansion of the original work, we moved to an OpenVPN host-based installation to support either TUN or TAP connections.